Product Page – Social Media Share Icons
Web Design・Online Shop Design・Social Media・Social Media Sharing
eshopland ecommerce platform is equipped with comprehensive web design features that are user-friendly, enabling any merchants to design personalized and professional online shop effortlessly. Merchants can customize the design of social media sharing icons on product pages to align with ones’ business operational needs.
1. The Product Page Style
Go to Admin Panel > Design > Pages, click “Products” to enter the page.
The “Products” page is automatically generated by the system.
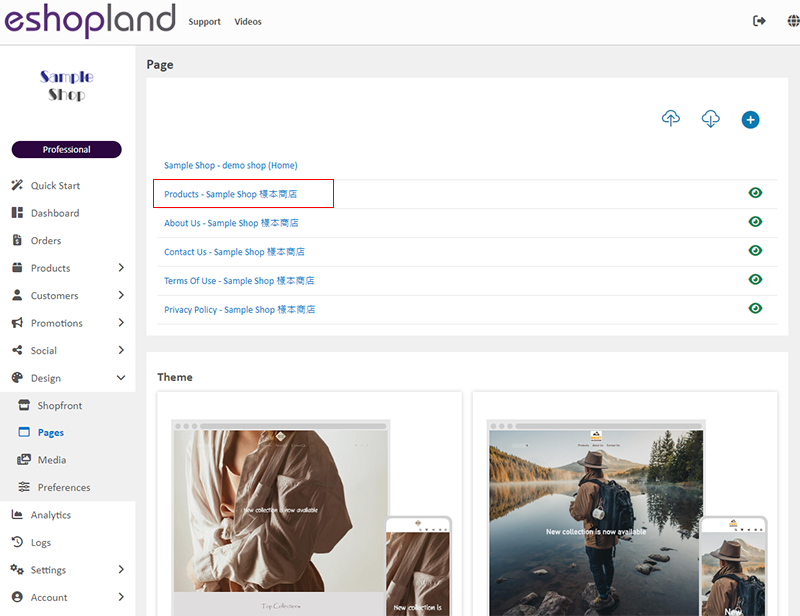
Scroll down to Single Product session,
Click “Product Page Style” to enter the Single Product Design setup page.

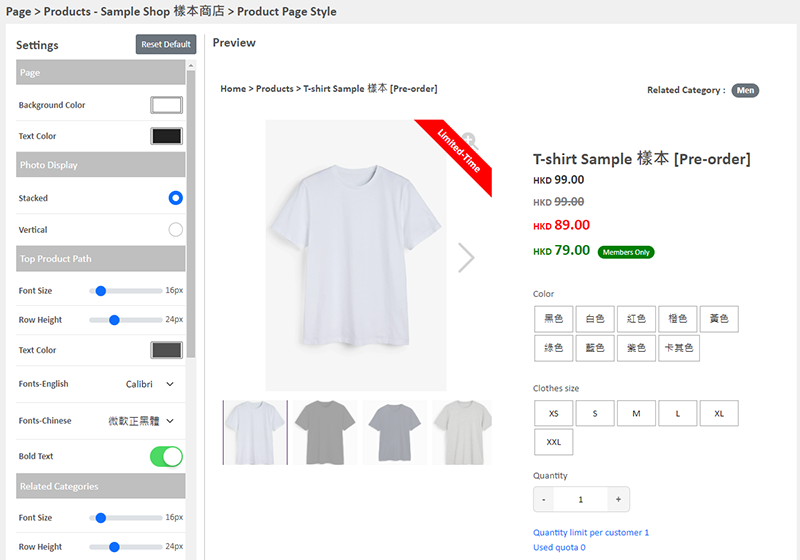
2. The Product Page Style Tools
One the left is the toolbar for designing the Single Product Page.
The product page design tool uses “preview design” approach, allowing you to preview the design effects in real-time.
The design style will be applied to all single product pages.
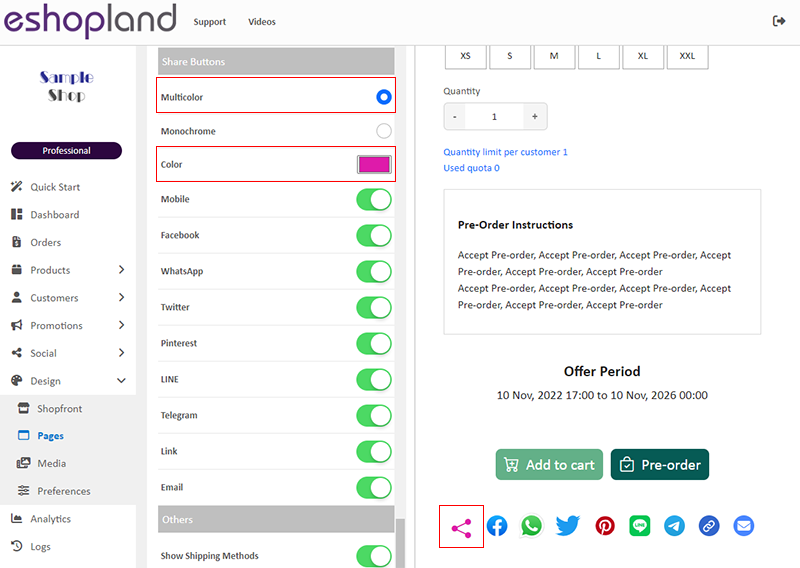
3. “Share” Icons Design
Multicolor
Set the “Share” icons to “Multicolor”.
The color modifications will not affect other social media icons; these icons will retain their original colors.
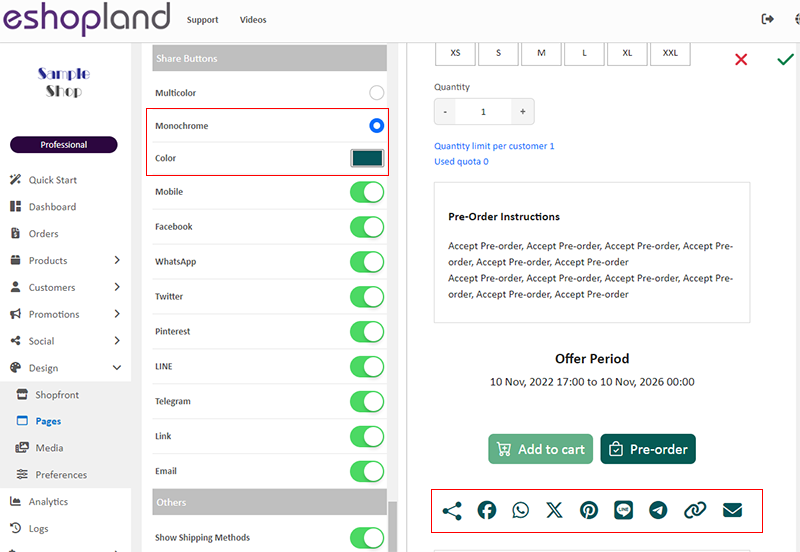
Monochrome
When you set the color of the “Share” icons to “Monochrome”; the settings will be applied to all share icons.
4. “Share” Icons Display
Merchants can select the social media sharing icons you wish to display.
Enabled  social media icons will be displayed on all product pages.

5. Apply the Settings
When finished setup, Save  the settings.
Popular Articles


You May Also Like
QFPay Online Payment
eshopland ecommerce platform integrated with QFPay payment gateway system which supports various payment methods such as credit cards, digital wallets and other online & offline payment methods. esh... [read more]
Faster Payment System - FPS
eshopland system supports merchants to use Fast Payment System (FPS) as a payment method of their online shops, allowing eshop customers to manually transfer payment using the merchant’s FPS ID, re... [read more]
Category List Style
When you design your online shop website, adding an All Categories & Products module on the page or select the All Categories & Products style on the “Products” page and add your own design on the ... [read more]
“Privacy Policy” Template
To help merchants quickly create a privacy policy page, eshopland online shop platform has launched a Privacy Policy generator. Simply enter your shop’s contact details, and the system will automat... [read more]